How to Use KineMaster for Basic Video Editing: A Complete Guide

Introduction
Video editing has become a vital skill in today’s digital age, whether for social media, personal projects, or professional content creation. KineMaster is one of the most popular mobile video editing apps, known for its user-friendly interface and advanced features.
In this article, we will take you through a step-by-step guide to video editing with KineMaster, focusing on the essentials for beginners. You will learn how to use KineMaster for basic video editing, exploring tips, tools, and techniques to create high-quality videos.
Why Use KineMaster for Video Editing?

KineMaster stands out because of its ability to offer professional-grade editing tools while maintaining a simple and intuitive interface. Whether you’re new to editing or have some experience, KineMaster provides a smooth learning curve. Its features include multi-layer editing, transitions, effects, text, and more, making it an all-in-one solution for mobile editors.
For beginners, KineMaster’s free version is a great starting point, offering plenty of tools to work with. Paid versions offer even more advanced features like watermark removal and access to premium assets. In this guide, we will focus on the free version to get you comfortable with the basics.
Step 1: Downloading and Installing KineMaster
To get started with basic video editing in KineMaster, download the app from the Google Play Store (for Android users) or the Apple App Store (for iOS users). The app is free, though there is a premium version with additional features.
Once installed, open the app, and you’ll be greeted by a clean and user-friendly dashboard. The home screen offers options like “New Project,” “Get Projects,” and “Settings.” We’ll focus on starting a new project for the purpose of this tutorial.
Step 2: Creating a New Project
After opening KineMaster, tap on the “New Project” button. You’ll be asked to select an aspect ratio for your video. Popular options include:
- 16:9 (for YouTube or widescreen videos),
- 9:16 (for Instagram Stories or TikTok),
- 1:1 (for square videos on social media).
Choose the appropriate aspect ratio based on your target platform.
Step 3: Importing Media Files
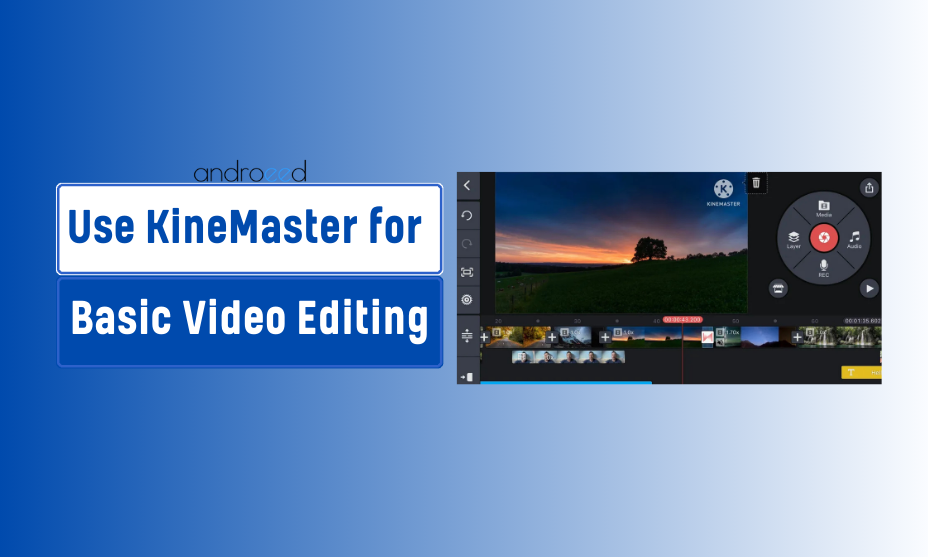
After setting the aspect ratio, you’ll be directed to the editing screen. The first step is to import your media files (videos, images, or audio clips). Tap on the “Media” icon, located on the right side of the interface. From here, you can access your phone’s gallery and select the files you wish to edit.
Tips for Importing:
- Organize your media before importing to streamline the editing process.
- You can import multiple files at once to save time.
- KineMaster supports a wide range of file formats, making it versatile for different content types.
Step 4: Basic Editing Tools
KineMaster offers several basic editing tools that are perfect for beginners. Let’s explore the most essential tools:
Trimming and Cutting Clips
To trim or cut a clip, select the video timeline at the bottom of the screen. A yellow outline will appear around the selected clip. You can drag the edges of the clip inward to trim excess footage or use the scissors icon for more precise cutting. This is particularly useful for removing unwanted sections of your video.
Splitting Clips
To split a clip, place the playhead (the vertical line in the timeline) at the desired split point and tap the scissors icon. From the options that appear, choose “Split at Playhead” to divide the clip into two. This is useful for inserting transitions or making jump cuts.
Adjusting Speed
KineMaster allows you to adjust the speed of your video clips. Select a clip, then tap on the speed icon. You can slow down or speed up the clip depending on the effect you want to achieve. This feature is particularly useful for creating slow-motion or time-lapse effects.
Step 5: Adding Transitions
Transitions help smooth the shift between two clips and enhance the overall flow of your video. To add a transition, tap on the plus icon between two clips in the timeline. KineMaster offers a variety of transitions like fades, wipes, and 3D effects.
Commonly Used Transitions:
- Fade-in/out for a smooth start or end to the video.
- Wipes for a more dynamic effect.
- 3D transitions for a professional touch.
Ensure your transitions are smooth and not too over-the-top, as they can disrupt the viewer’s experience if overused.
Step 6: Adding Text and Titles

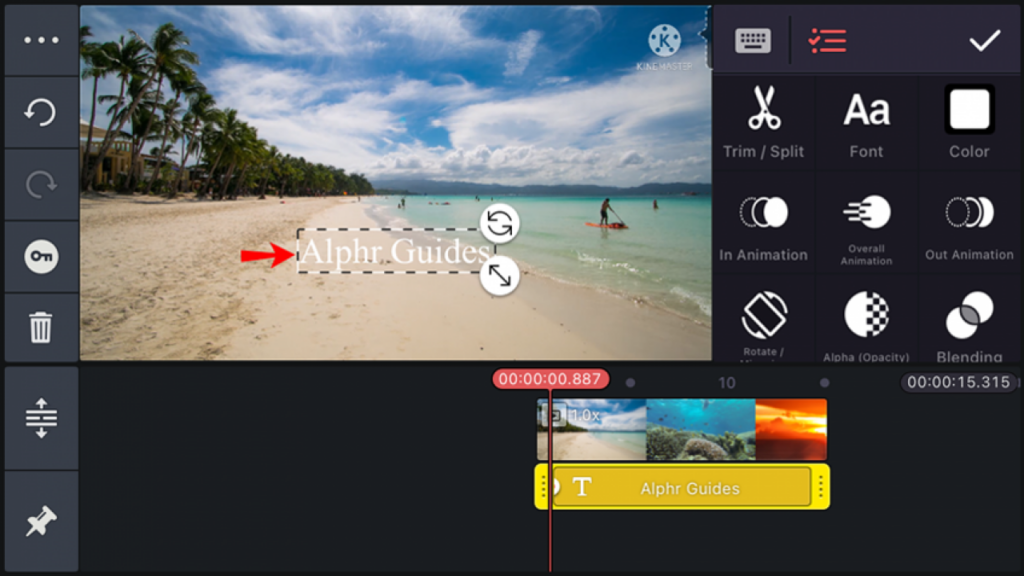
Adding text to your video is essential, especially for intros, outros, or call-to-action messages. Tap the “Layer” icon and select “Text.” From here, you can type in your desired text, choose the font, size, and color, and even animate the text. KineMaster also offers text effects, such as in/out animations.
Practical Uses for Text:
- Titles at the beginning of your video.
- Captions to make your content more accessible.
- Call-to-action messages like “Subscribe” or “Follow.”
Step 7: Adding Music and Audio
A video without sound often feels incomplete. KineMaster allows you to add background music, sound effects, or voiceovers easily. To add audio, tap on the “Audio” icon, and you’ll be able to select music files from your phone or use free music available in KineMaster’s asset store.
Tips for Adding Audio:
- Background music should complement the visuals, not overpower them.
- Use sound effects to emphasize important actions or moments in the video.
- Record voiceovers directly in KineMaster by tapping the microphone icon.
Step 8: Adding Effects and Filters
To give your video a polished look, KineMaster provides a range of filters and effects. Tap the “Layer” icon and choose “Effects” to explore options like color grading, blurring, and even advanced chroma key features (for green screen editing).
Popular Effects:
- Blur: Ideal for censoring sensitive content or focusing attention on a specific part of the video.
- Color grading: Adjust the mood of your video by changing its color scheme.
Step 9: Exporting Your Video
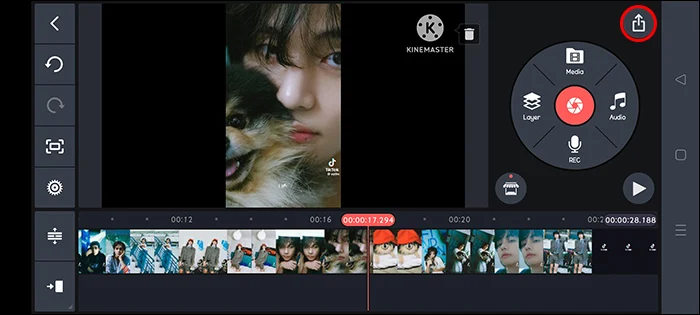
Once you’re satisfied with your video, it’s time to export it. Tap the export button (usually a square with an arrow pointing upwards). Choose your desired video resolution (720p, 1080p, etc.), frame rate, and file size. KineMaster allows you to export videos in HD quality, even in its free version, although a watermark will be present unless you upgrade to the premium version.
Common Challenges When Learning KineMaster
While KineMaster is user-friendly, beginners may face a few challenges when first starting out. Some common issues include:
- Lagging during editing: This can happen when editing high-resolution videos on devices with low processing power.
- Watermarks: The free version of KineMaster includes a watermark, which can only be removed with a premium subscription.
- Storage issues: Video files can be large, so ensure your device has enough storage space for both the app and the project files.
Conclusion
Learning how to use KineMaster for basic video editing is straightforward, even for beginners. The app provides a range of tools to help you create professional-looking videos right from your phone. By following this step-by-step guide, you’ll be able to produce content that stands out, whether for social media, personal projects, or business purposes.
Remember, the key to mastering video editing is practice. The more you experiment with KineMaster’s tools, the more comfortable you’ll become. Whether you’re cutting clips, adding transitions, or fine-tuning audio, KineMaster equips you with all the tools you need to start editing like a pro.
Now that you’ve learned the basics, you can explore advanced features like multi-layer editing, blending modes, and even chroma key (green screen) effects. Happy editing!’
Frequently Asked Questions (FAQs)
1. Is KineMaster easy to use for beginners?
Yes, KineMaster is designed with an intuitive interface that makes it easy for beginners to start editing videos. Its drag-and-drop features, simple tools, and built-in tutorials provide a user-friendly experience even for those with no prior editing experience.
2. What basic video editing features does KineMaster offer?
KineMaster offers essential editing features such as trimming, cutting, splicing, and cropping videos. You can also add text, images, music, voiceovers, transitions, and effects to create engaging content.
3. Can I edit videos in different aspect ratios on KineMaster?
Yes, KineMaster allows you to choose from multiple aspect ratios, including 16:9 (YouTube), 9:16 (Instagram Stories/TikTok), and 1:1 (Instagram posts), making it versatile for different platforms.
4. How do I add music to my videos in KineMaster?
To add music, simply tap the Audio button in the KineMaster editing interface, select a track from your device or KineMaster’s audio library, and place it in your timeline. You can also adjust the volume, trim the audio, or loop it to fit your video.
5. Can I save and export my edited videos in high quality?
Yes, KineMaster allows you to export videos in various resolutions, including up to 4K resolution at 30fps. You can adjust the video quality based on your needs, ensuring your final output is high-quality and suitable for different platforms.